If you have ever synced an iPhone/iPad or some other such device to iTunes simply by connecting your device to Mac then you’ll definitely have backup folders residing on the internal drive. It is possible that you might just have one or two iTunes backup files which do not eat lots of space on your drive. But it is also highly likely that you’ve been using iTunes to backup your iPhone/iPad for years and all those backups have now turned into a kind of space hog that doesn’t leave much of it behind for other things.
So, if you’re a fan of iTunes backups for iPhone/iPad and also find it necessary to put these backups off your personal Mac and use some external drive for this purpose then you can very much do that. Just be cautious, however, as Apple does not really recommend you to do such a thing.
Jump To Section:
- What Are The Backup Files All About And Why They Take So Much Of Space?
- How To Shift iPhone/iPad Backups To External Drives
- Removing The Symlink To Start Storing Backups Internally On Mac Again
What Are The Backup Files All About And Why They Take So Much Of Space?
When you take backups of your iPhone/iPad using iTunes, your backups are stored on Mac in the folder that is known as MobileSync. And, if you are taking backups for years then it is very much likely for these backups to get too big, particularly when you have synced several 128+ GB iOS devices that have lots of stuff on them. It is true that old backups get replaced with the new ones, but if there are several devices that are backed up using iTunes on same computer then it can easily raise concerns about storage space.
It is recommended that you switch to iCloud syncing and delete the backups from Mac rather than relocating them.But if you are still willing to shift backup data to external drive then continue reading to explore the process.
How To Shift iPhone/iPad Backups To External Drives
Here is the step by step process to shift your iPhone/iPad backups to external drives.
-
Locate iPhone/iPad Backups First
There is nothing so difficult in locating the iPhone/iPad Backups that you have on your Mac drive. As mentioned earlier, these backups are kept in the MobileSync folder. You can launch Spotlight and type “~/Library/Application Support/MobileSync/Backup” to find them. It is also possible to find specific device backups from iTunes. Here is how.

- Launch iTunes on your Mac
- Click the iTunes menu in top left of the screen
- Click Preferences from dropdown menu
- Click to open Devices tab
- Choose a particular device
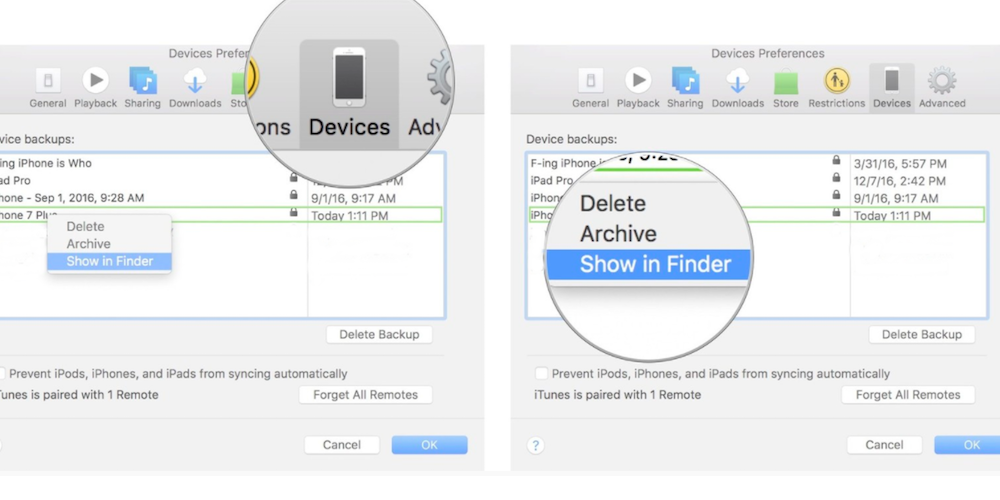
- Click the device while holding down Control key
- Now choose “Show in Folder” in the list that appears
-
Shift Backups To External Hard Disk Drive
In fact, there isn’t much difficult in this part either. But what you should be careful about is the name of the hard disk drive and the names of new folders that you will create. You will have to give all this information when you’ll be creating the Terminal pathway. If different names are used than those used in this Tutorial then carefully replace the two in Terminal Command that will be shown in next step of the process.
- Connect external hard to the Mac
- Open your external hard disk drive
- Go to Finder window having iOS backups opened and choose Device Backup folder(the name will either be Backup or some letters/numbers will be there in the name)
- Drag the folder to the external hard that you have connected
- You will have to authenticate the action here by entering the administrator password of your Mac
- Rename your backup folder which you now have on the external hard disk drive. Set the new name to iOS_backup
- The old folder that you have in the Finder should be renamed to old_backup as well
Just make sure that you don’t delete that old_backup folder at this point.
-
Set Up ASymlink That Will Tell New Backups’ Location To iTunes
Now that’s the tricky point in the process and is, in fact, the most important part of the process. If you skip this step then iTunes will not backup your iPhone/iPad anymore. Rather, you will have to move all the folders back to the Mac manually.
Here, you will actually be setting up a symlink – also referred to as symbolic link – that is effectively the new path that will be used by iTunes for getting to your backups folder. You are basically creating some type of alias in the Finder.

In fact, symlinks are the older way to create such connections as aliases but they are probably more reliable and tell iTunes exactly what to do. Neither applications nor the OS functions find any issues dealing with symlinksas compared to aliases. The Terminal app of Mac will be used in this Tutorial for creating the symlinkthat will tell iTunes to take backups to external drive rather than keeping them on boot drive.
Here it is important to mention that you need to give proper pathway for all this to properly work out. The name of the folders and hard drives will be different in each case and you should replace yours with the ones used here in this example. Let’s first find out what Terminal code basically looks like and what each part corresponds to:
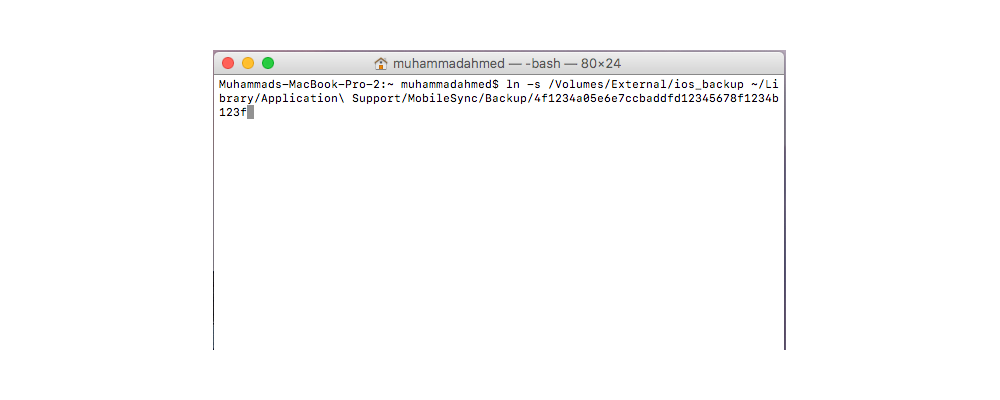
ln -s /Volumes/External_Hard/ios_backup ~/Library/Application\Support/MobileSync/Backup/5f1234a05e6e7ccbaddfd12345678f1234b123d
- ln -s: It’s a command which guides OS to simply go to new location of the backups.
- Volumes: It refers to a hard disk drive.
- External_Hard: It is the name of the external hard disk drive that you are using. You must replace this with the actual name of your external hard disk drive in Terminal Command.
- ios_backup: It’s your renamed backups folder that you had earlier dragged to the external drive. That’s exactly where your backups will now be stored.
- ~/Library/Application\ Support/MobileSync/Backup: It is the command which tells your OS where your backup is.
- 5f1234a05e6e7ccbaddfd12345678f1234b123d: These numbers refer to the backup folder for a particular device. If all the backups are transferred then it should be just “Backup” but if you are transferring only one of the devices, like iPhone only, then you will have to use the exact name of device’s backup folder. Just replace the one in the command mentioned above with the actual folder name you have on your Mac for the said device.
If there is a space in the name of the external hard that you are using, just make sure that you use proper coding for that. For instance, if the name is “My HardDisk” then you should enter ‘\’ after My and then give a space before HardDisk. It will look like this “My\ HardDisk”. Take care of capitalization as well.
Let’s move on to the steps you need to follow for setting up the symlink.
- Use Spotlight to find Terminal
- Enter following code. Just make sure that you do necessary changes according to the name of your hard drive and backup folder.
ln -s /Volumes/External_Hard/ios_backup ~/Library/Application\ Support/MobileSync/Backup/5f1234a05e6e7ccbaddfd12345678f1234b123d
- Press Enter
- Close the Terminal
Now, you’ll be able to see new folder inside the MobileSync folder which is either named as “Backup” or the numbers/letters sequence representing your particular device. An arrow towards the bottom left will mean that it’s a symlink.

Now, before deleting the old_backup file from Mac, just confirm that it all worked. Here is how to do that.
- Launch iTunes on your Mac
- Connect iPhone to your Mac and take a backup
- Open your iOS_backup folder from the external drive
- Take a look at the time and date on latest backup stored in the folder to check if it’s the one you’ve just taken

If the relocation has worked, and the backups are going into the new backup folder on external drive, go ahead and delete that old_backup folder from your Mac.
-
Disable The Automatic Backups Option When iTunes Is Connected
If your external drive is not always connected to the Macthen you will have to disable the automatic backups option for your iPhone/iPad. If you don’t do that then every time your device is connected to the Mac, an error message will pop up right away. Here is how to disable these automatic backups.
- Launch iTunes on your Mac
- In top left corner of the Mac screen, click iTunes
- Click Preferences in dropdown list
- Click on Devices tab
- Now you will see a checkbox labeled Prevent iPhones, iPads and iPods from syncing automatically, just make sure that it is checked
Always backup your iPhone manually whenever it is connected to iTunes while making sure that the external drive is also plugged in.
Removing The Symlink To Start Storing Backups Internally On Mac Again
If you went wrong somewhere and your symlink just did not work, or you just don’t want to keep backups on the external drive anymore, you can simply delete that symlink folder that you had created in the process. Nothing else has to be done for this. Here is how to delete the symlink folder.
- Open Spotlight and enter ~/Library/Application Support/MobileSync/Backup command
- Click to select symlink folder, the one having an arrow towards bottom left.
- Delete the selected folder
- Backup your device using iTunes normally
- Now delete iOS_backup folder that you have on external drive as well.
Note: The last step is optional and you may keep the iOS_backup folder if you want.