Nowadays, we choose to keep most of our favorite music online. However, keeping backup on our local hard drive is still a good strategy to keep things on the safe side. And, if you are a fan of iCloud Music Library or Apple Music, the best backup option you have got is iTunes.
It is possible to create iTunes Library backup in several different ways. Make sure that you choose one of these options and then take regular backups. So, let’s get into the process without any delays.
Jump To Section:
- Ensure That Entire Library Is Downloaded Locally
- How To Create iTunes Backup Using Time Machine Or Some Other Service
- How To Create iTunes Library Backup Manually
- Creating A Temporary Backup When Needed
Ensure That Entire Library Is Downloaded Locally
If you are a user of iTunes Store or iCloud Music Library then it is very much possible that all or some of the music files are stored on a cloud. However, if you want to ensure that all your content is part of the backup then you will have to download a copy locally on your Mac.
How To Create iTunes Backup Using Time Machine Or Some Other Service
If you are already using Apple’s built-in Time Machine or some other backup service, it should automatically cover your iTunes Library as well. So, if you have to restore iTunes Library ever, you can simply go to History of your Time Machine – or the previous backup of any other service you are using –and retrieve it from there.
How To Create iTunes Library Backup Manually
It is also possible to create iTunes Library Backup manually and here is how you can do that.
Consolidate The Library
For making sure that all the iTunes content is residing in same place before going with the manual backup option, you should consolidate the iTunes Library first. Here is how to do that.
- Download all your music to Mac as a local copy
- Launch iTunes
- Click to open File menu in top left side of the screen
- In the drop down list, hover the cursor over Library option
- In secondary menu, choose Organize Library option
- Check the Consolidate Files checkbox on Organize Library screen
- Now click OK.
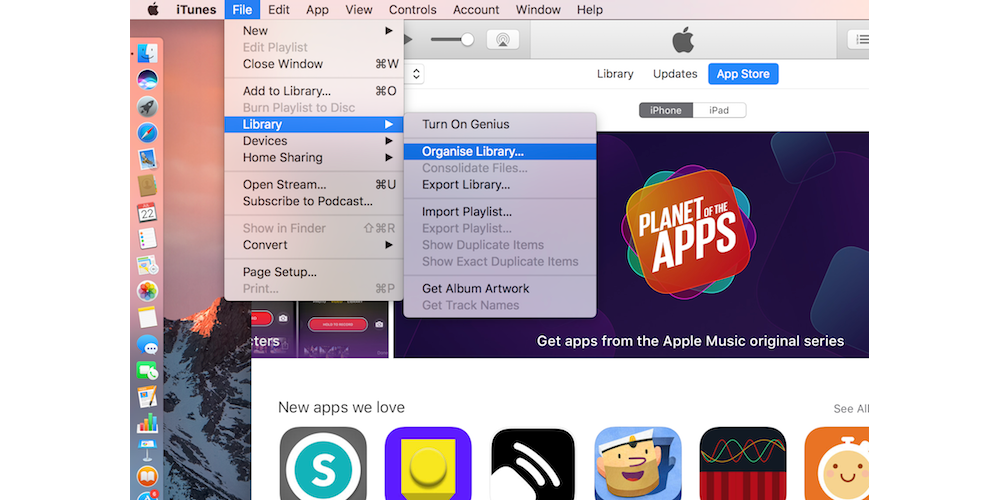
It will now copy all your files to the folder labeled iTunes media while the original files will be left behind in their current location.
Copy iTunes Library Files To Some Backup Source
Here are the steps for copying iTunes Library files to some backup source.
- If you’re using some external drive, first connect it using USB cable to the Mac.
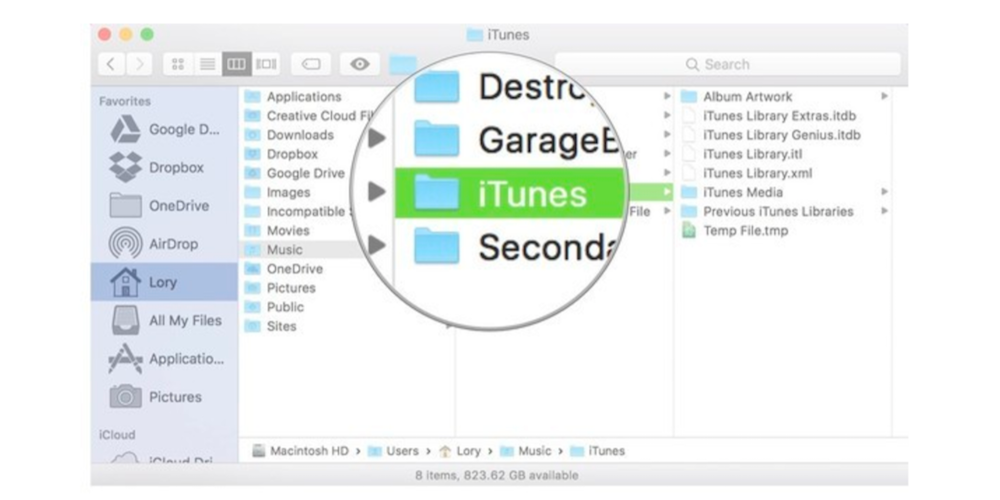
- Click Finder to launch it.
- Select the Hard drive of your Mac.
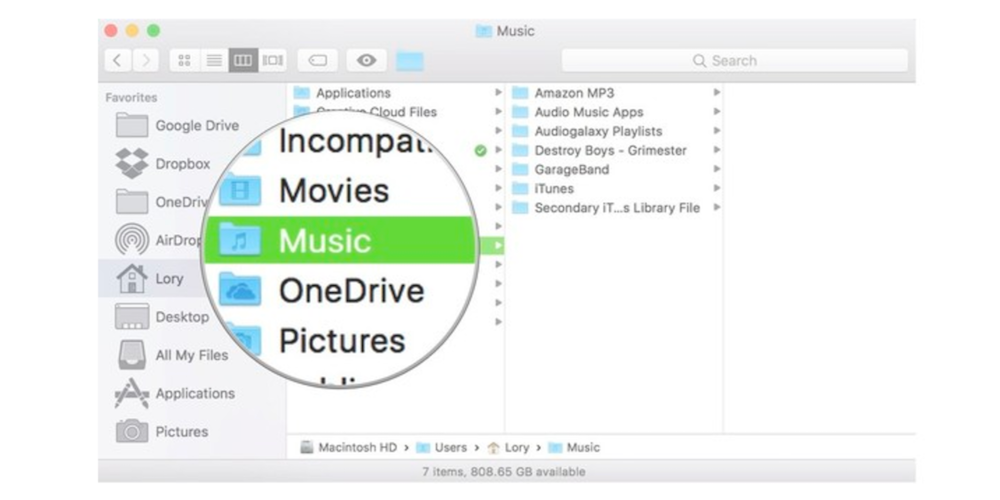
- Now click Music folder.
- Select iTunes before dragging the folder to external drive icon that you can see on the desktop.Alternately, copy the folder to online backup.
- Now click on Authenticate and allow new copy of iTunes folder.
- Type in your device’s Administrator Password.
- Finally, click OK.
Creating A Temporary Backup When Needed
If you’re trying to do some experiments with the iTunes library and still do not want to create a backup on some online service or an external hard drive, you still have the option of making temporary backupon the Mac you are using. As the name suggests, it’s a temporary backup and should be used only when you immediately have to roll back after whatever you’re trying to do.
Note: Once you have a copy of your iTunes Library, you can put the copied folder in some easy-to-browse location outside the folder that is intended to be changed. You can delete the copied folder when it is not needed anymore to save space and avoid any kind of confusions.
Here is how to create a temporary backup.

- Click Finder to launch it.
- Select the hard drive of your Mac.
- Click Music Folder.
- Control-click or right-click on iTunes Folder.
- Choose the Duplicate option in drop down list. (It will start the copying process and it may take long to complete.)
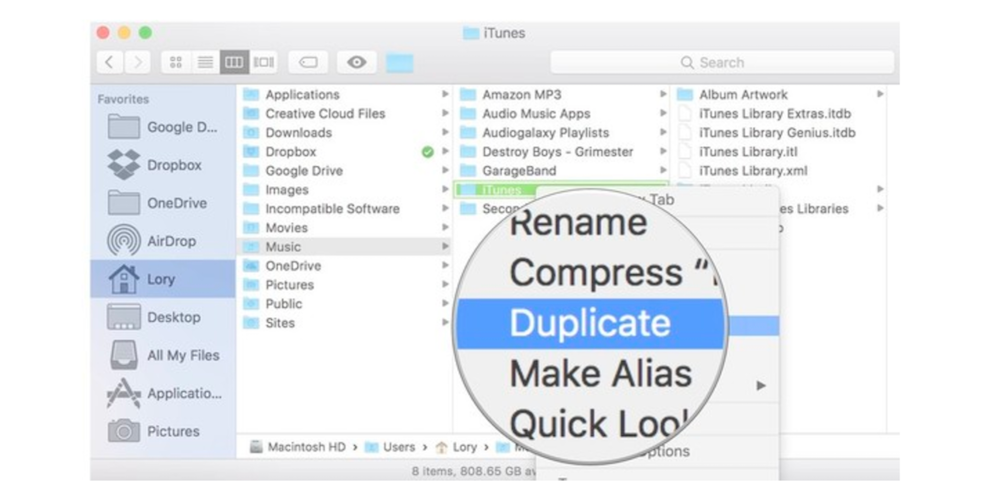
- Now move this copied folder to some new location and remember it.
- Delete it as soon as you don’t need your temporary backup.
These are a few options that you can try when it comes to creating your iTunes Library backup. Choose one that you deem appropriate for your situation.


